

How To Make A Repeating Text Pattern In Photoshop
In Photoshop, you can pattern a seamless pattern to use as a edge of an image, to fill a shape, or to but use on its own. The offset fourth dimension I thought about making a repeating pattern I imagined it to exist a lot more technical than it really was. However, with a few basic filter options and the right canvas size, you can make a repeating pattern in Photoshop in simply a few minutes!
To create a new pattern in Photoshop, go to Edit > Define Pattern and requite the pattern a name in the dialogue box that appears. Then click OK to save your new pattern, which can be located in the pattern fill settings, or within the layer styles.
At present using these steps will create a basic pattern, but it will not have a seamless transition every bit the design repeats. For that to happen, you demand to utilize a specific sheet size and use some basic filters to get the job done. Let'due south me evidence you exactly what you need to practice!
Best Canvas Size & Resolution For Patterns
To create a blueprint, y'all must first make the base of your pattern, which comprises simple elements and shapes that can be repeated to create the complete pattern.
For the all-time results, you'll need to begin with the right size sail. You'll eventually repeat the blueprint and move elements effectually using the displace function, which requires a square-shaped canvas for simplicity. The square shape will let the repeated pattern to fit together seamlessly without cutting the blueprint off awkwardly. Using a rectangular canvas will prevent the pattern from fitting together correctly and information technology will create overlapping shapes.
For this reason, I recommend either a 400x400px or 500x500px size canvas, with a resolution that is high enough for your needs (if y'all're printing, y'all'll desire a college resolution than if you'll be displaying the final upshot digitally). I would propose 300PPI (Pixels Per Inch) if you aren't sure which resolution to choose.
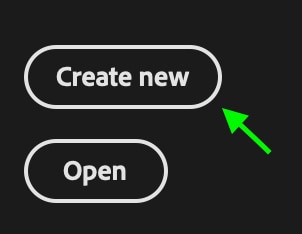
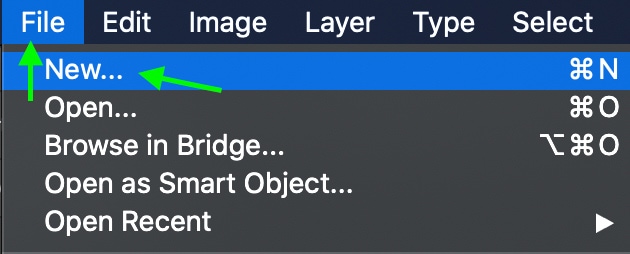
To set the correct certificate dimensions, click Create New after opening Photoshop, head to File > New, or press Control + N (Win) or Command + Due north (Mac).
In the window that appears, yous can edit the size and resolution of your document in the panel on the right. Enter the dimensions you demand, equally long as the width and pinnacle are the same and the canvass size allows yous plenty room to make your design. You lot tin can also adjust the resolution here if demand be.

How To Create A Seamless Pattern In Photoshop
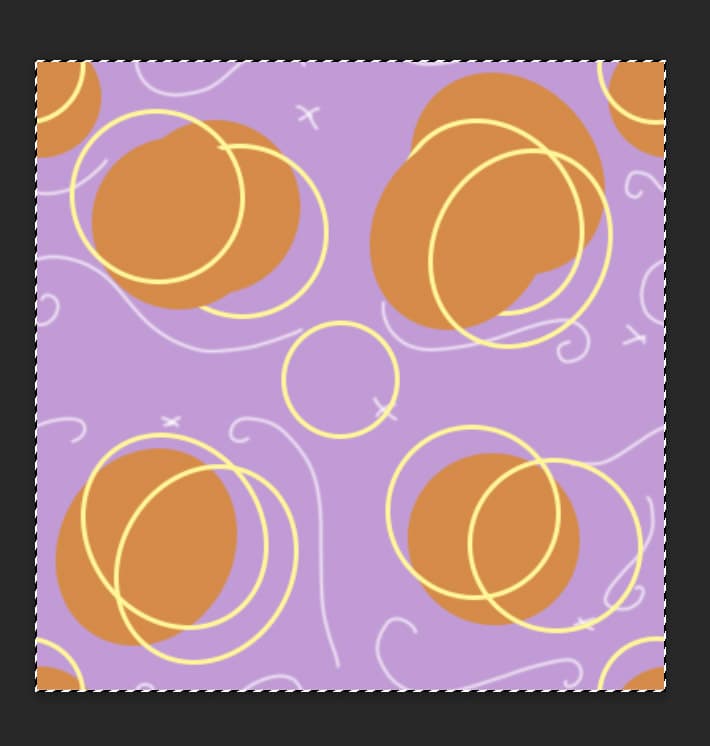
First, you need to create the shapes and elements you desire your pattern to be fabricated upward of. This is the area that will exist repeated to course the full design. To do this, y'all can use a diversity of elements including different shapes, brush strokes, and colors. Below, y'all'll see the pattern I've created.
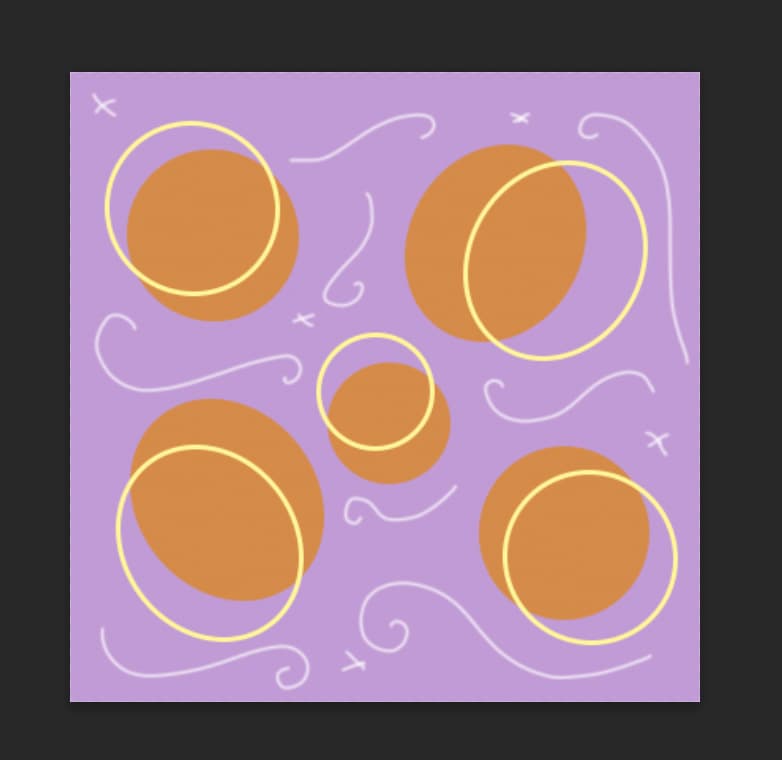
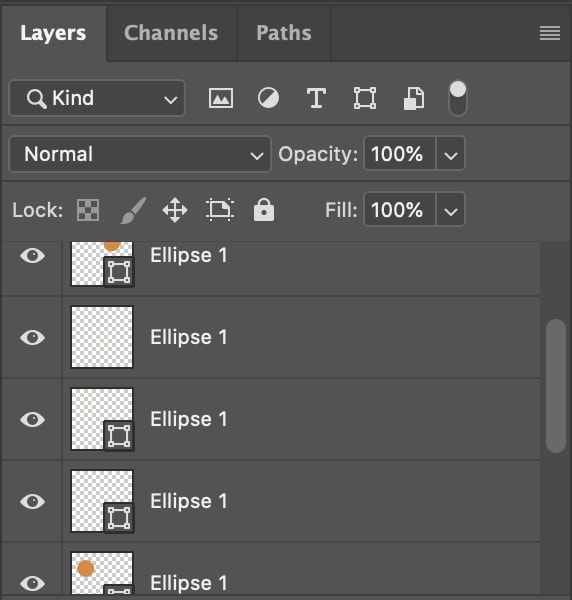
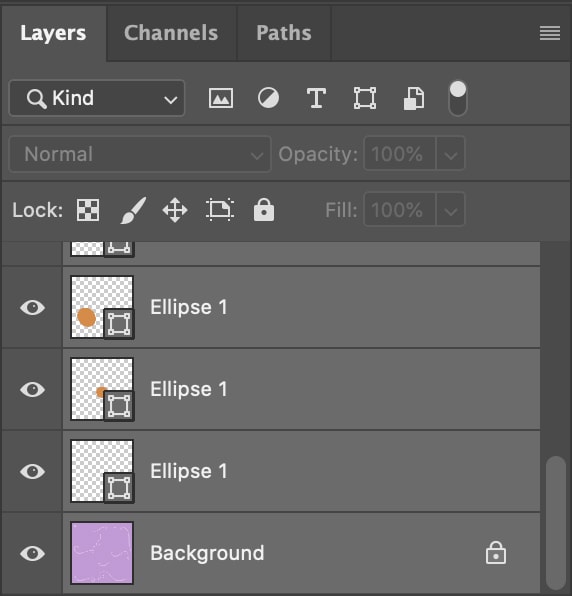
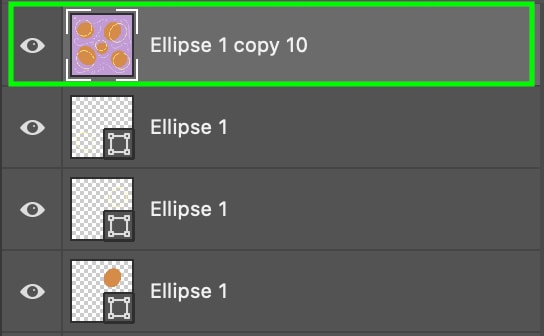
Make annihilation you're feeling at this point, but make sure each element has its own layer and then that you tin can hands become back and edit the different elements of your blueprint if demand be. If you expect at my Layers panel, for instance, you'll run across an abundance of ellipses, as each element is on its ain layer.
How To Make A Pattern Seamless
At present, in one case you've double-checked that all the different elements of your pattern — the groundwork, shapes, etc — are each as you want them, we're going to indistinguishable and merge them all into one.
The original layers volition remain in case you lot need to edit them, simply we will add together another layer consisting of all the merged elements. This is the layer that we will repeat to brand up the overall pattern.
To merge the layers, head to the Layers panel and Shift + click all the layers and so that they are all selected. When selected they will plow a lighter gray.
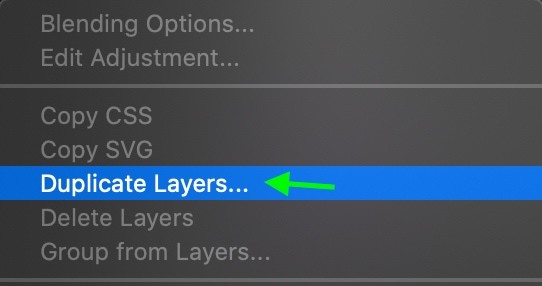
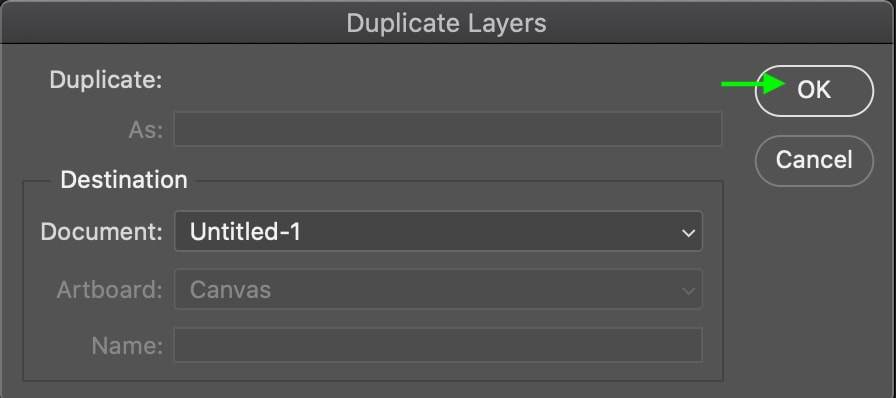
At present, correct-click (Win) or Control + click (Mac) the selected layers and select Duplicate Layers from the available options. Click OK in the window that appears.
The layer copies will appear in your Layers panel, and they will automatically be selected. Without clicking off to deselect them, right-click (Win) or Control + click (Mac) the selected layer copies and select Merge Layers.
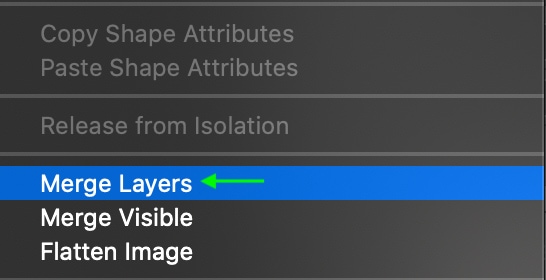
Once you've merged the layers, you'll notice a new layer appears in your Layers Panel containing all the elements and layers of your project.
Another way to merge the layers is to employ the shortcut Control + Alt + Shift + Due east (Win) or Command + Selection + Shift + E (Mac) after you accept selected all your layers. This shortcut will simultaneously duplicate and merge all of the unlike elements onto ane layer.
It is very important to duplicate all the layers before merging them as this volition permit you lot to go dorsum and brand any adjustments to private elements of your project. Otherwise, all the layers will merge into i and you won't be able to access and edit the different elements anymore.
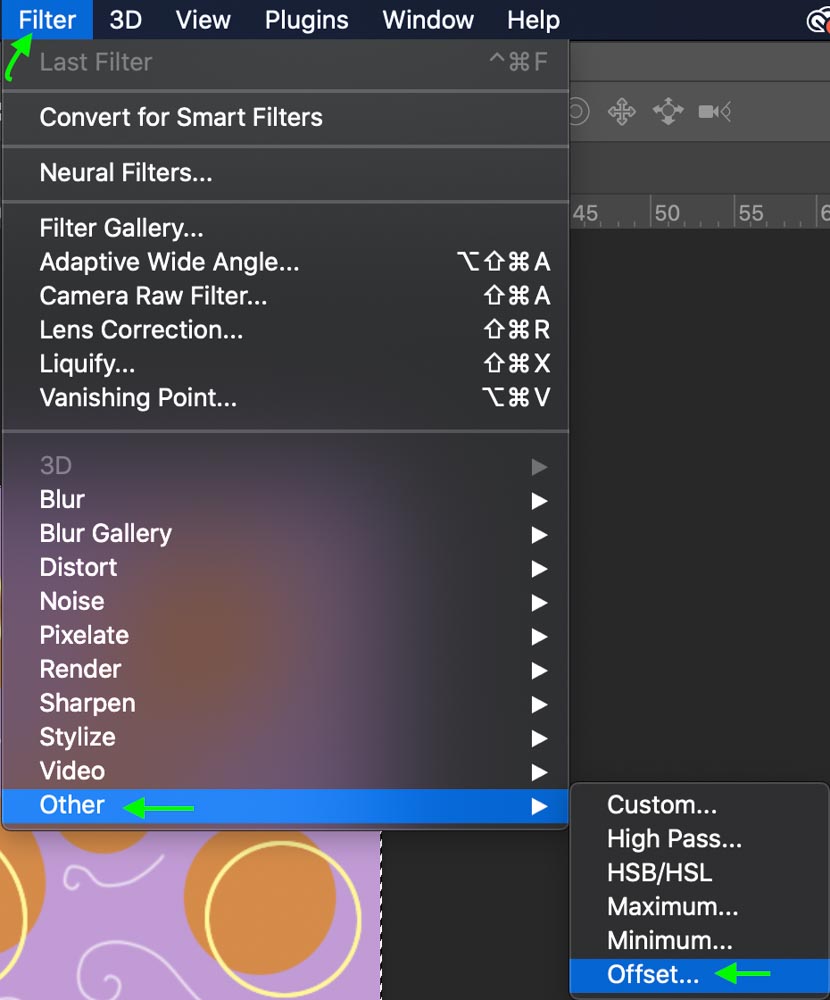
Now it's time to brand the blueprint seamless. With this merged layer selected, head to Filter > Other > Offset.
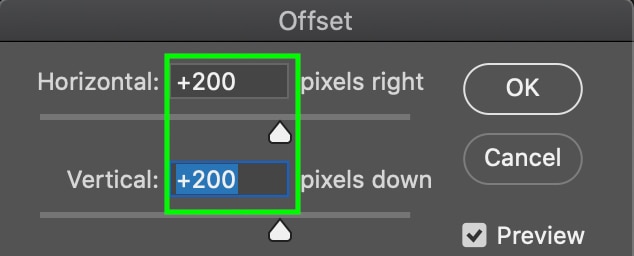
The get-go corporeality should exist half of the canvas dimensions. For case, as my canvas dimensions are 400×400, my get-go amount will exist +200 for both the Horizontal and Vertical settings.
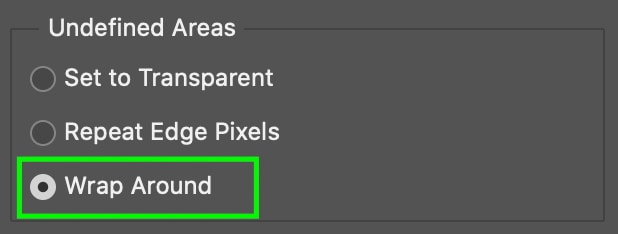
Then, in the Undefined Areas section, brand sure to select Wrap Effectually. Once the settings are selected, click OK.
You'll notice that doing this will shift effectually the different elements in the pattern. This ensures that, once the base of your blueprint is repeated, the different elements will fit together in a way that looks seamless. It might make the blueprint you've designed look a piddling different, but one time the blueprint repeats, information technology looks like your original pattern design over again.
Keep in mind that this process can leave some open spaces in your blueprint (often in the middle of the square). Having big empty spaces might look strange once the design is repeated. At this indicate, you may want to add elements to those areas of your pattern that don't have anything going on so that the pattern looks better once it is put together.
How To Create A New Pattern Preset In Photoshop
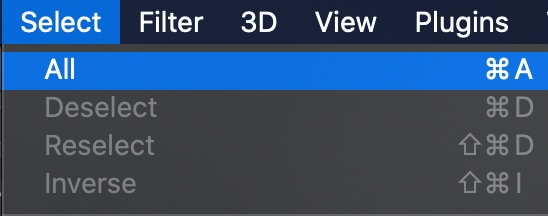
Once yous're happy with how your blueprint looks, you can save information technology so that you can admission the pattern at a afterwards stage and use information technology equally a design chemical element. To do this, brand sure the blueprint is selected past heading to Select > All.
Then, become to Edit > Define Pattern.
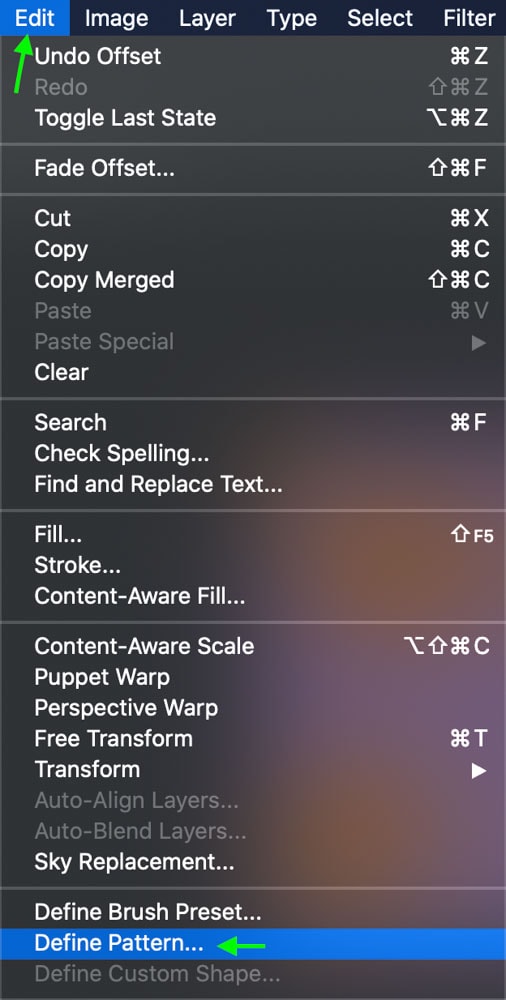
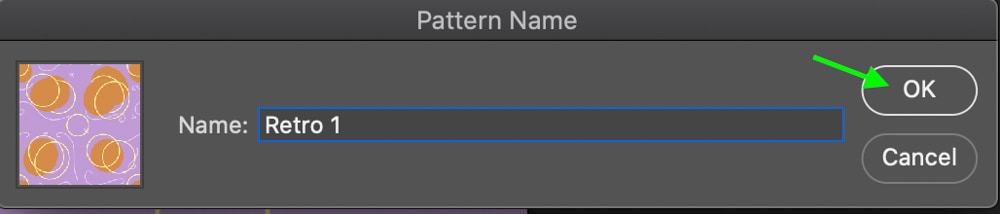
When the window opens, proper noun your pattern and click OK.
You lot'll now have a full blueprint yous can admission whenever yous'd like to use it to fill an element of a project. Next, nosotros'll take a look at some different ways y'all tin can utilize your new blueprint while working in Photoshop.
Putting Your Custom Pattern To Use
In that location are different ways you tin can use your pattern, from using information technology to fill up shapes to using it every bit a border for a shape or an image. Permit'south take a expect at our blueprint in activity by filling a shape with the blueprint.
Fill A Shape With A Pattern
First, I've created a new certificate and added a new shape by heading to the Shape tool.

To fill up this shape with the pattern you've made, head to the Options bar, click the Fill area and, in the panel that appears, click the Patterns icon on the far right.


Here, you will see the pattern yous've made beneath the default shape categories.
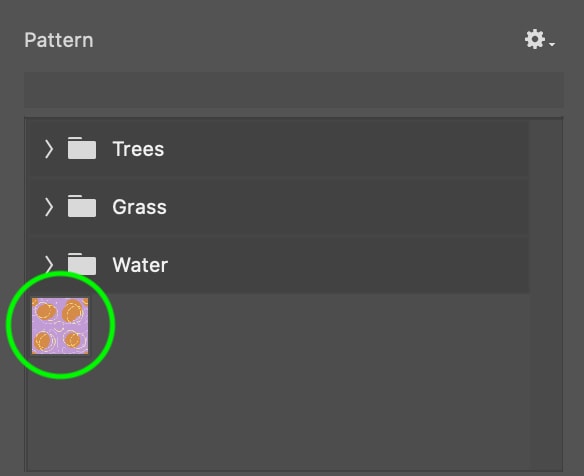
Click on your pattern to fill your shape with it.
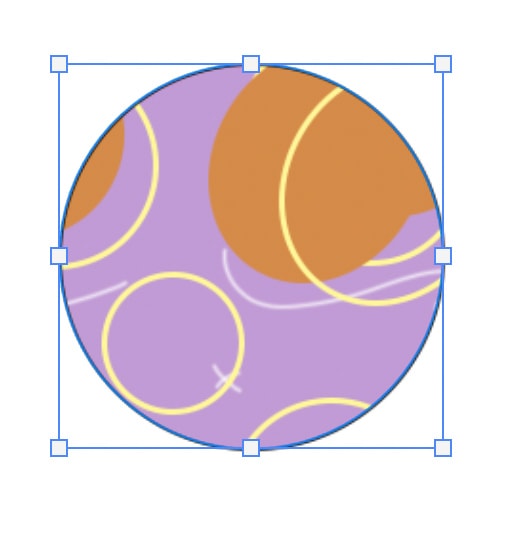
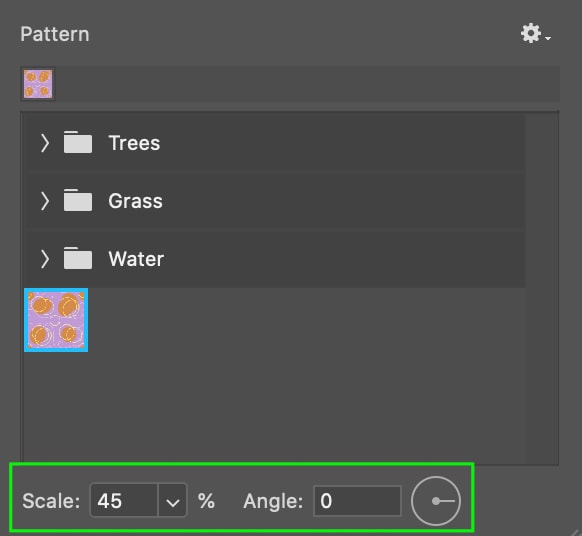
At get-go, your pattern might not appear the style you thought it would. Above, my pattern appears to be zoomed in and so much that you can't run across the actual pattern. Luckily, you can alter the mode your pattern appears on the shape using the Calibration and Angle settings at the bottom of the console.
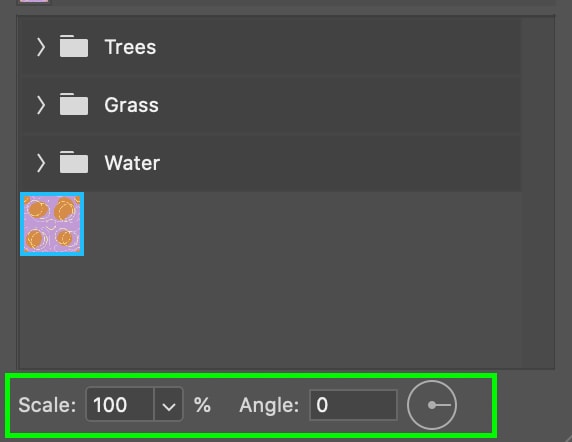
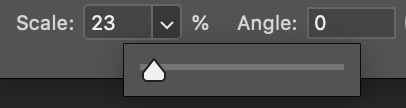
The calibration option determines how many times the design is repeated within the shape. Irresolute the scale of the pattern from 100% to 23% will repeat the pattern more ofttimes. Since the design was created to exist seamless, it doesn't matter which scale you utilise.
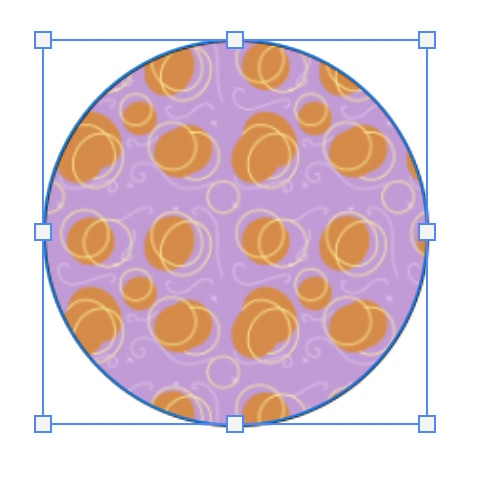
You can also conform the Bending setting to rotate your pattern. Play with these settings until you're happy with how your design looks.
Add The Pattern Every bit An Outline
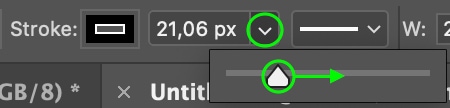
You can also add the pattern to the stroke of a shape to create a border. To practise this, add the shape you lot'd similar to a new document. Once y'all've added a shape, you'll exist able to find the stroke settings in the Options bar.

I'd first suggest increasing the width of your stroke, at least temporarily, so that you lot can see the pattern in action. To practice this, click the drop-down arrow adjacent to the width setting and slide to the right to increase the width.
Side by side, y'all can add the pattern to your stroke past clicking the box adjacent to Stroke.

In the panel that appears, click the patterns icon on the far right. Here, you'll see your pattern beneath the dissimilar pattern categories.
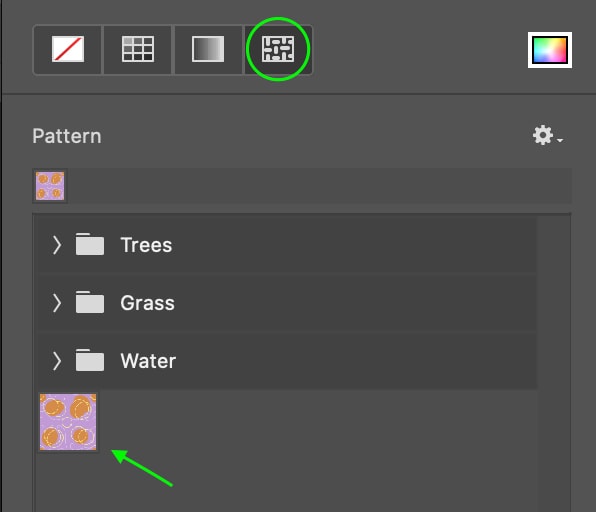
One time yous select the pattern, it volition be applied to the stroke as a border.
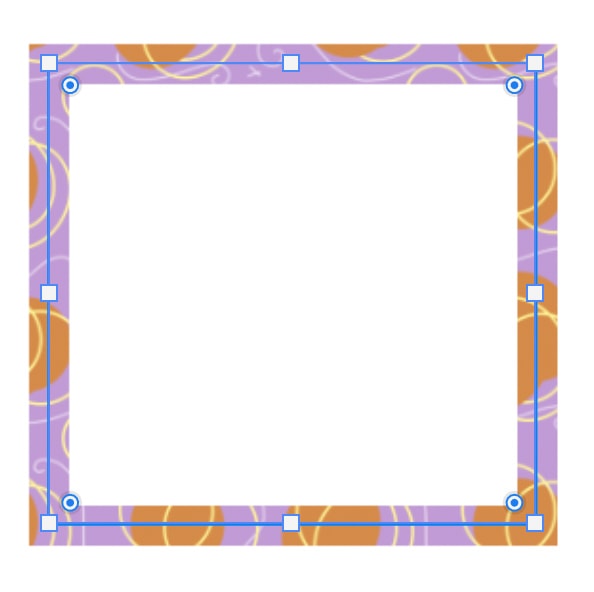
Again, you tin can edit the Scale and Angle of the pattern at the bottom of the console to alter how the shape looks within the stroke.
Another manner of using your new design preset is within the Layer Styles as a pattern overlay. This is helpful when you want to fill text, layers, or selections with a design rather than an editable shape layer. To access your layer styles, only double-click on your layer and apply your desired effects!
Happy Editing!
Source: https://www.bwillcreative.com/how-to-make-a-seamless-pattern-in-photoshop/
Posted by: wilcoxknitted.blogspot.com
0 Response to "How To Make A Repeating Text Pattern In Photoshop"
Post a Comment